How to Add Appointments with Services and Products?
Print
Created by: Harsha Verma
Modified on: Mon, 22 Jan, 2024 at 1:45 PM
To get started, initiate the appointment creation process through the service options, and provide the necessary details as outlined. Follow the specific information required during the appointment addition.
Firstly, you have to add the products to book the appointment.
Then, you have to select Type of Appointment According to Your Choice.
Regular appointment with checkout : By selecting this option, you'll need to proceed with the payment before the appointment can be successfully booked.
Instant booking no checkout : Using this option, you have the flexibility to schedule an appointment without going through the checkout process.

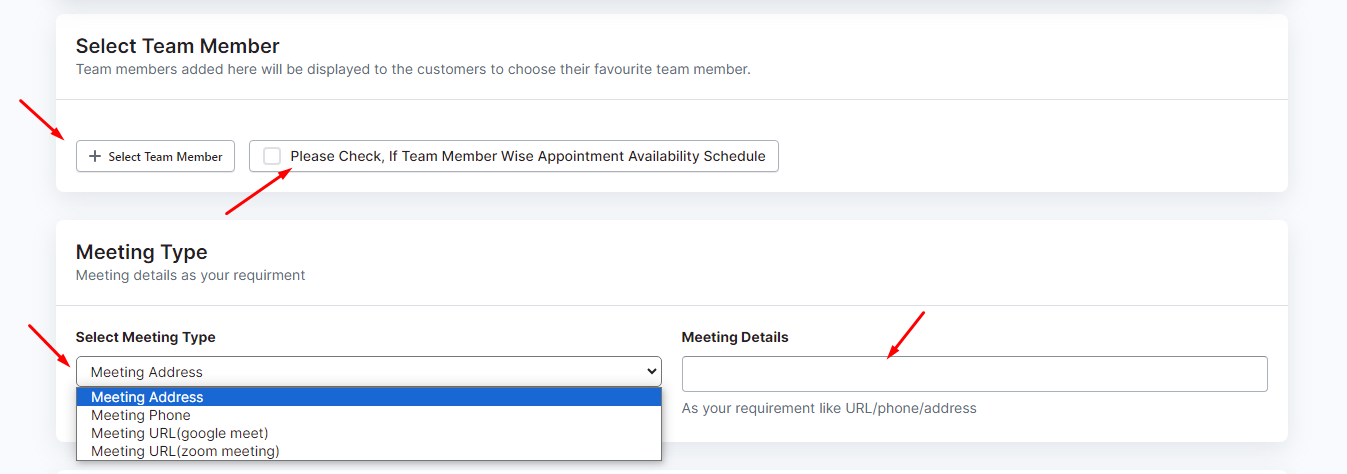
Next, you'll need to choose the team member, if you have one already, and mark the checkbox if you prefer to schedule the appointment based on specific team members.
Then, you need to select the meeting type. There are some options like ; Meeting Address, Meeting Phone, Meeting URL (Google Meet), Meeting URL (Zoom Meeting).
After that, you have to add the meeting details accordingly.
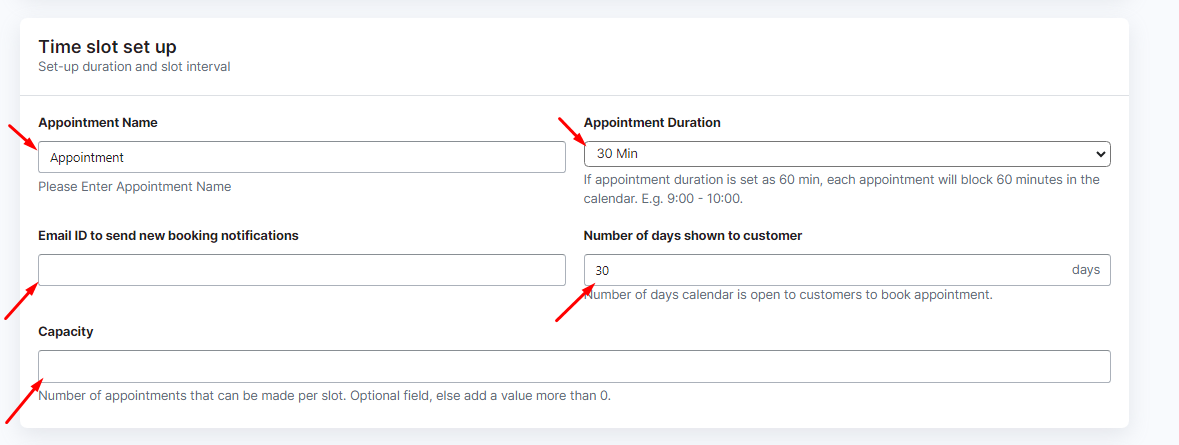
Now, you need to configure the time slot by providing the necessary details below.
Appointment Name : You can add the appointment name as per your convenience.
Appointment Duration : You have to select the time duration.
Add Email ID
Select the Number of days shown to customer.
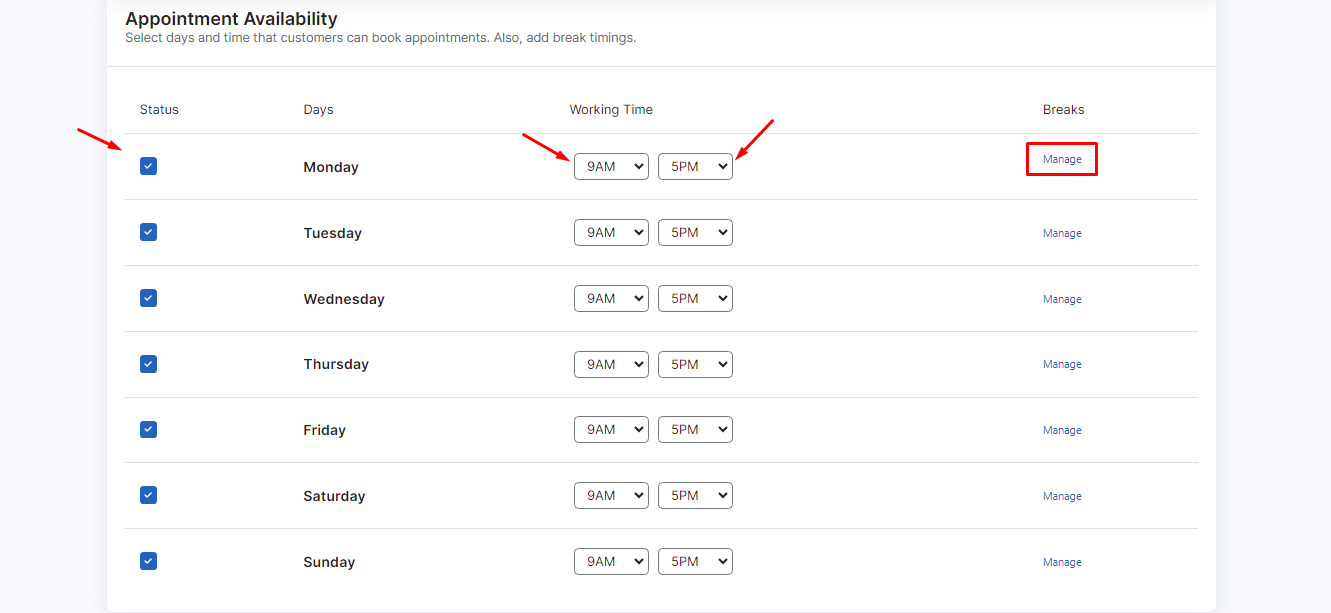
You have to select the date and time that customer can book appointments, also add break timings from manage option.
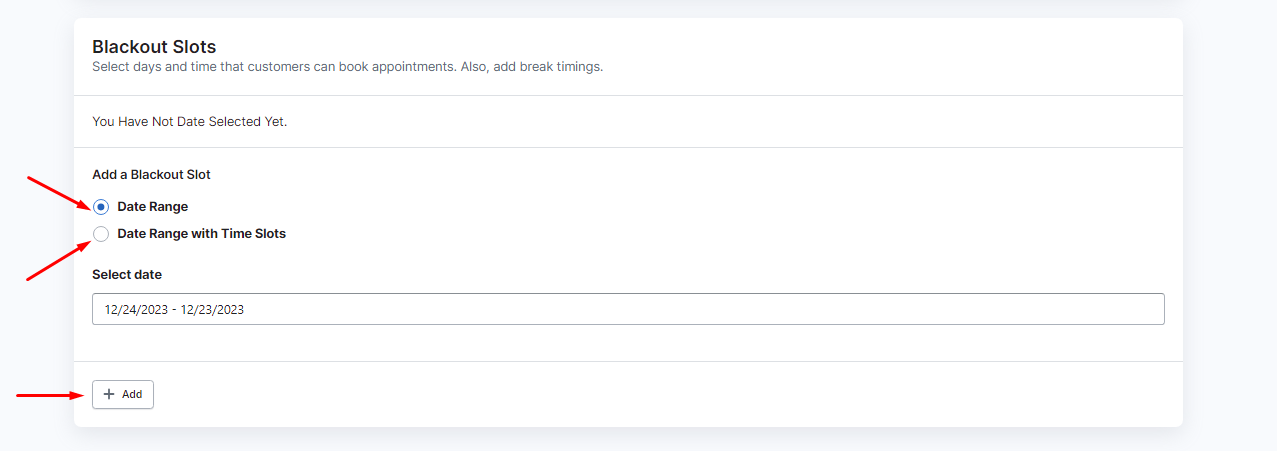
Please adhere to the instructions by choosing the blackout slots to eliminate from your appointment availability on specific days and times.
Choose the date range if you prefer to black out slots based on dates; alternatively, you can also select a date range inclusive of specific time slots.
Harsha is the author of this solution article.
Did you find it helpful?
Yes
No
Send feedback Sorry we couldn't be helpful. Help us improve this article with your feedback.